If you’re looking to elevate the aesthetic of your interiors, wood panelling kits offer a stylish and practical solution. These kits provide an easy way to add texture and character to your walls without the need for extensive renovations. For a wide selection of high-quality options, be sure to checkout wood panelling kits that can suit any interior style.
1. What Are Wood Panelling Kits?
Wood panelling kits are pre-packaged sets that include all the necessary components to create a paneled wall. These kits typically contain wood panels, mouldings, skirting boards, dado rails, and all the fixings required for installation. They are designed for easy DIY installation, allowing homeowners to achieve a professional-looking finish without the need for custom fabrication.
The beauty of wood panelling lies in its versatility. Whether you’re aiming for a classic, rustic, or modern look, these kits provide an effortless way to add texture and style to your walls. From traditional tongue-and-groove designs to contemporary slatted patterns, wood panelling can transform any room into a warm and inviting space.
2. Why Should You Consider Wood Panelling Kits?
There are several reasons why wood panelling kits are a great option for home improvement projects. Below are some of the most notable advantages:
Affordability
One of the main reasons people opt for wood panelling kits is their affordability. Custom wood panelling can be quite costly, especially if you hire a professional for installation. On the other hand, wood panelling kits provide a more budget-friendly alternative. Most kits come pre-cut and ready to install, which eliminates the need for custom fabrication and reduces installation costs. You’re getting a high-end look for a fraction of the price.
Easy Installation
Another major advantage of wood panelling kits is how easy they are to install. Many kits are designed for DIYers, with most of the hard work already done for you. The panels are pre-measured and pre-cut to fit standard wall sizes, and the kits usually come with everything you need for installation, including trim and adhesive. With the help of clear instructions, most homeowners can complete the installation in a weekend without needing professional help. This makes wood panelling kits an excellent option for those who want to upgrade their interiors quickly and affordably.
Durability
Wood is one of the most durable materials available, and when used in a wood panelling kit, it ensures that your panels will last for many years. Wood panelling is resistant to wear and tear and can stand up to heavy foot traffic, humidity, and other common household challenges. Moreover, wood panelling is less likely to warp, crack, or fade compared to other wall treatments, making it a reliable choice for long-term use.
Aesthetic Appeal
There’s no denying the beauty of wood. It adds a rich, natural element to your home that can’t be matched by other materials. Whether you choose a polished, high-gloss finish or a rustic, matte finish, wood panelling creates a warm and inviting atmosphere. A wood panelling kit can help you achieve a variety of looks, from traditional wainscoting that adds timeless charm to your space to sleek and modern designs that create a more contemporary feel.
Increases Property Value
High-quality wood panelling can increase the value of your property. If you’re planning to sell your home or rent it out, well-installed wood panelling can be a major selling point. It enhances the overall look and feel of your home, making it more appealing to potential buyers or tenants. Since wood panelling kits are so affordable, they offer an excellent return on investment by increasing the value of your property for a relatively low cost.
3. Different Styles of Wood Panelling Kits
One of the greatest advantages of wood panelling kits is the wide range of styles they offer. Whether you prefer a classic or modern look, there’s a style that will suit your taste. Here are a few popular options:
Wainscoting
Wainscoting is one of the most traditional forms of wood panelling. It typically covers the lower half of a wall, often paired with decorative moulding or trim. This style is commonly used in dining rooms, hallways, and entryways. A wood panelling kit designed for wainscoting adds a sense of elegance and sophistication to any room.
Shaker Panels
Shaker-style wood panelling is known for its simplicity and functionality. It features clean, straight lines and a minimalist design, making it perfect for modern homes. Shaker panels work well in almost any room, from bedrooms to living areas. They provide a timeless look that complements both traditional and contemporary décor.
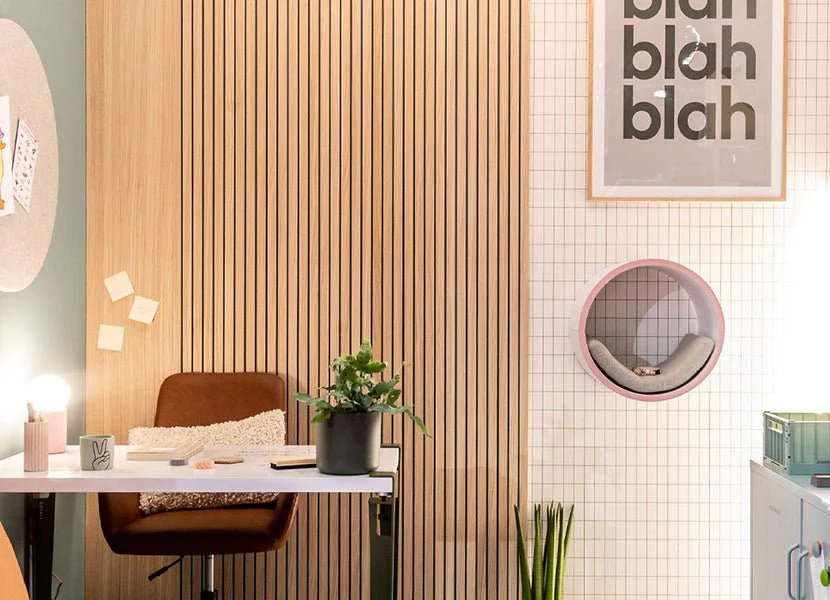
Slatted Panels
Slatted panels are an excellent choice for those who prefer a more modern look. These panels consist of narrow strips of wood arranged in a horizontal or vertical pattern. Slatted wood panelling kits add depth and texture to your walls, creating a sleek and stylish focal point in any room. This style is particularly popular in contemporary homes and minimalist designs.
3D Textured Panels
For those looking to make a bold statement, 3D textured panels are an exciting choice. These panels feature raised patterns that add dimension to your walls, creating a visually striking effect. They’re ideal for feature walls or accent walls that are meant to stand out. A wood panelling kit with 3D panels can create an eye-catching focal point in any space.
4. How to Install Wood Panelling Kits
Installing a wood panelling kit is relatively easy and straightforward. Here’s a general guide to help you get started:
Step 1: Prepare the Wall
Before you begin installing your wood panelling kit, make sure the wall is clean and smooth. Remove any old wallpaper, nails, or screws, and patch up any holes or cracks. For best results, apply a coat of primer to the wall to ensure good adhesion.
Step 2: Measure and Mark
Accurate measurements are crucial for a perfect fit. Measure the area where you want to install the panels. Use a tape measure to determine the length and width of the space, and mark the wall to ensure that the panels will be level and evenly spaced.
Step 3: Cut the Panels
Most wood panelling kits come pre-cut to standard sizes, but you may need to trim some panels to fit around the edges or corners of the wall. Use a saw or utility knife to make precise cuts. Always measure twice before cutting to avoid mistakes.
Step 4: Attach the Panels
Apply adhesive to the back of each panel and press it firmly against the wall. Use a level to ensure that the panels are straight. If necessary, use nails or screws to secure the panels in place. Start at the bottom of the wall and work your way up, ensuring that each panel fits tightly against the next.
Step 5: Add Trim and Moulding
Once all the panels are in place, add trim and moulding around the edges to give your installation a finished look. This will help conceal any gaps and give the panels a polished, professional appearance.
Conclusion
Wood panelling kits offer a quick, easy, and affordable way to transform the look of your home. Whether you’re adding timeless wainscoting or creating a modern, sleek feature wall, wood panelling kits provide the perfect solution. With a variety of styles and finishes to choose from, you can easily customize your space and achieve a high-end look.
For an effortless home upgrade, be sure to checkout wood panelling kits that suit your style and budget. Start your renovation today and enjoy the beauty and durability of wood panelling in your home!